Buttermilk Fried Chicken

I’ve had a long love affair with cast iron. It has most of the qualities I look for in any partner: dependability, consistency, talent, and the ability to take what you put into it and give it back to you in a better state. It’s beautiful to behold, at work or at rest.
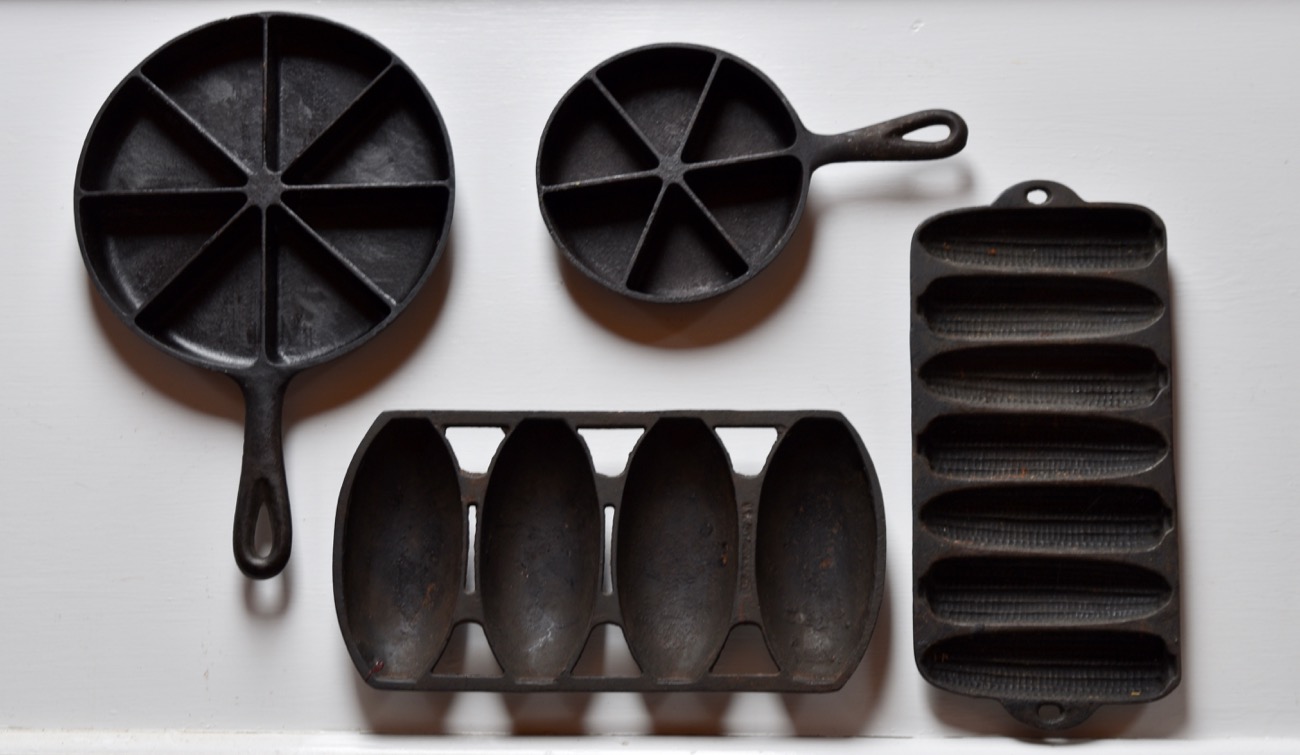
Clockwise from far right: a cornstick pan, a rare sandwich roll pan, a typical 8" cornbread skillet, and one of my favorite finds, a 5" mini cornbread wedge pan.
The shapes and forms it can take are endless. As someone whose idea of a good time is crawling through barns, attics, and flea markets for any antique cooking tool I can find, cast iron is often the treasure at the end of the hunt. If I could have only two pans to cook in, one would be a large All-Clad saucepan, and the other would be a cast iron skillet.
That skillet can bake a pie, cornbread, or tarte tatin. It’ll fry up scallion pancakes, bacon, eggs, hash, and home fries, sear a steak, bang out biscuits and gravy, and perhaps its highest purpose, fry a chicken.

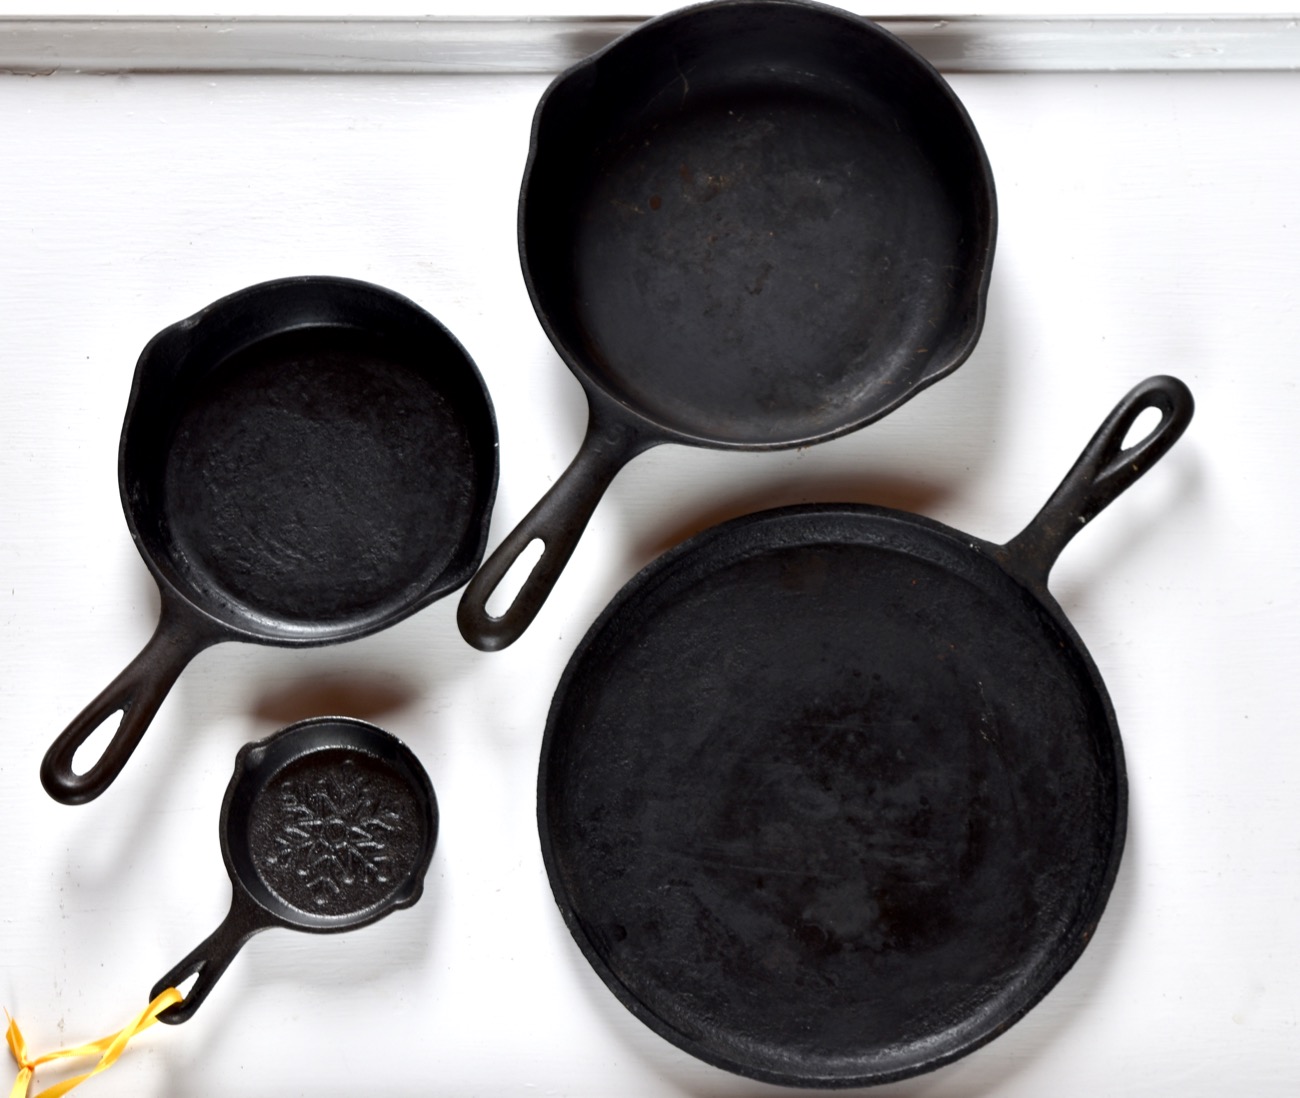
I nabbed this old Wagner skillet at a flea market, but didn't realize it was warped until I tried using it on my flat top stove.
I look for rusty, spider-egg garnished, ugly cast iron pieces for a pittance. Disqualifiers? Pans that are warped or pitted; those can’t be resurrected. But barring those two things, those neglected, unloved pans are a great value.
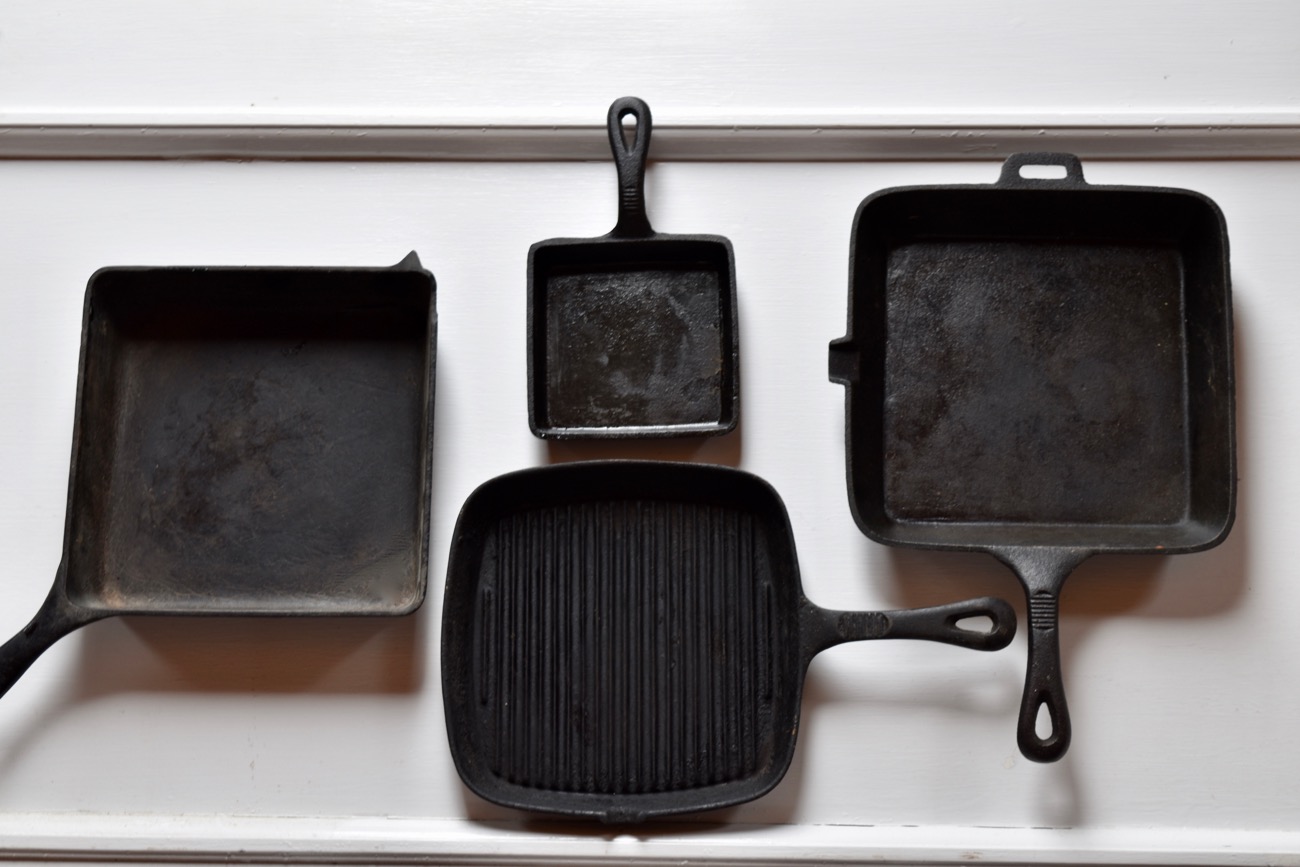
Clockwise from far right: a 9" square pan that's ideal for frying (note the pour spout), ridge grill pan, another 9" square pan that's 2 1/2" deep and ideal for baking; it's "helper handle" is wounded, but the pan works fine. Last but not least, a 5" grilled cheese pan, also good for making square fried eggs for sandwiches.
The cast part of cast iron refers to how it’s made: liquid iron is poured into a negative shape stamped into sand. As a result, its surface isn’t smooth; rather it’s pebbly and uneven if you look at it under a magnifying glass. All of those little variations on the surface will cause food to stick in the pan unless it’s seasoned.
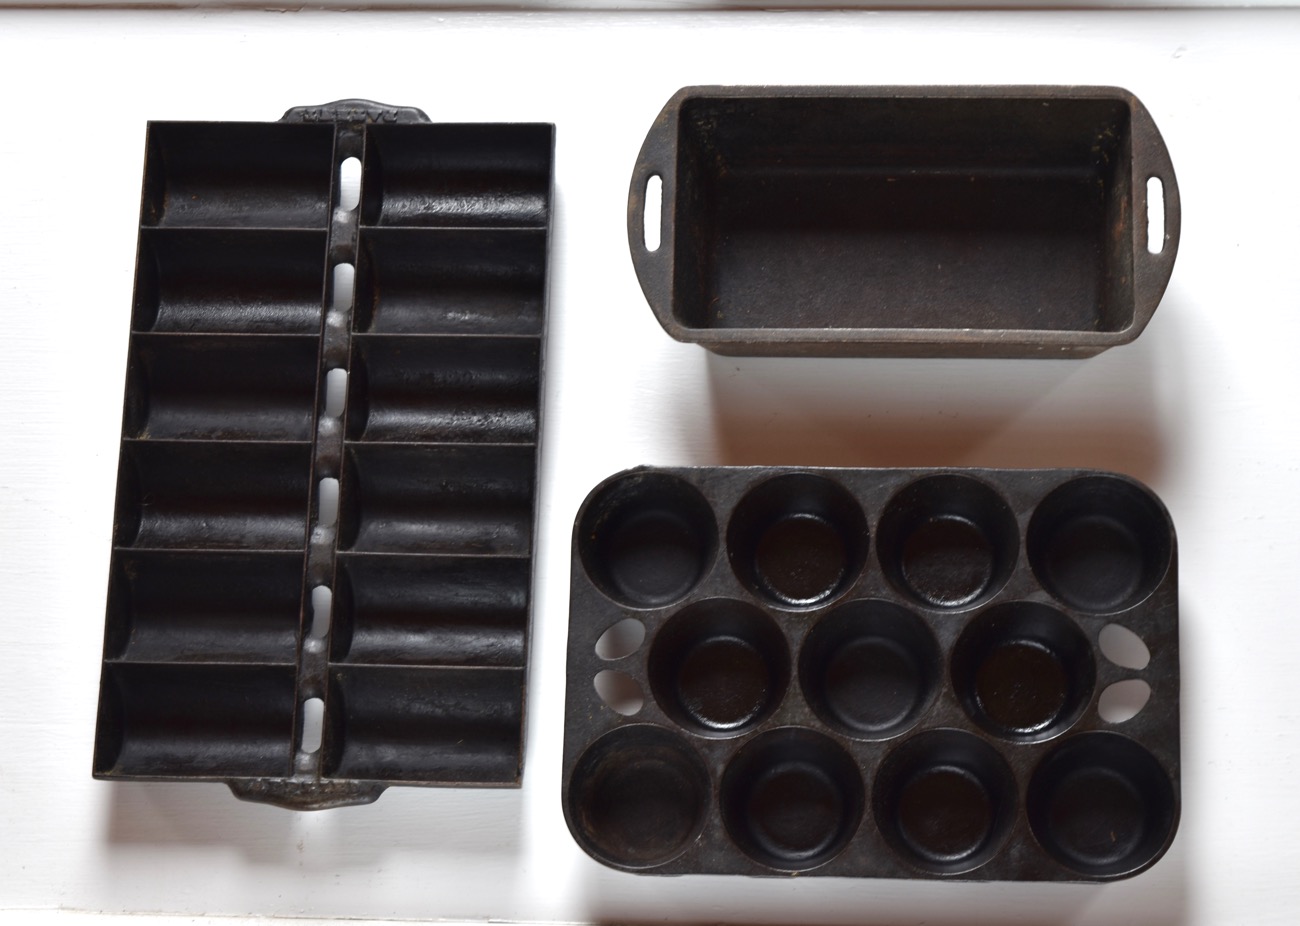
Before muffin pans, cast iron makers manufactured what are called gem pans, on the left. The loaf pan is particularly nice for crusty breads, and the muffin pan makes great popovers.
The next step is a good scrubbing with a steel wool soap pad. If the woodstove is going I’ll put it on there to dry it thoroughly. Then it’s time to season the pan.
Seasoning isn’t that difficult; it’s as simple as greasing the pan and heating it up. There’s a lot of voodoo and superstition about this, but what happens is simple. Fat goes through a process called polymerization when heated in the presence of metal and oxygen. A big word for what is basically a coating that fills in all the mini dents from the sand and creates a nonstick coating. The more times you use your pan, the thicker the coating gets, and the more nonstick it becomes. Some people use shortening for this, but I reach for peanut or canola oil (see more about shortening and oil below under Good to Know).

Two pans for classic Southern table breads: a breadstick pan above, and biscuit pan below. The biscuit pan can also make mini pies or tarts.
For culinary students, or anyone with access to a restaurant kitchen, the ideal seasoning tool is right in the kitchen: the fryolator. Pop the pan into the hot oil and leave it there for half an hour. Pull it out, drain it, wipe it down to get rid of any extra oil, and give it another half an hour in the oven. Boom. Done.
Buttermilk Fried Chicken
Brining the skinned chicken pieces in spiced buttermilk makes the pieces moist and flavorful; dredging in seasoned flour seals in the flavor and yields the crunchy, tasty crust that makes fried chicken so irresistible.
Buttermilk Brine
2 cups (16 ounces, 454g) buttermilk
1 tablespoon dry brine mix
1/2 teaspoon paprika
1/2 teaspoon ground black pepper
1/2 teaspoon Worcestershire sauce
Chicken
One 3 lb. whole fryer
Flour Dredge
1 1/2 cups (6 3/8 ounces) King Arthur Unbleached All-Purpose Flour
2 teaspoons salt
1/2 teaspoon ground black pepper
1/2 teaspoon paprika
Frying
3 cups peanut or vegetable oil
Gravy
Fond from frying + 2 tablespoons frying oil
3 to 4 tablespoons King Arthur Unbleached All-Purpose Flour
3/4 cup (6 ounces, 170 g) chicken stock
1/2 to 3/4 cup (4 to 6 ounces) half-and-half or milk
1 to 2 teaspoons dry brine mix
Salt and pepper to taste
set up the brine: Pour the buttermilk into a bowl big enough to hold all of the chicken's parts. Add the brine mix, paprika, salt, and Worcestershire. Stir to combine.

Clockwise from drumstick: skinned drumstick, chicken breast tender, skinned chicken breast, wing with breast meat, chicken skin, chicken neck and gizzard, chicken liver. When cutting up chicken I put my board inside a half sheet pan to contain the mess.
Cut up the chicken:
First things first:
wash your hands
work with a sharp boning knife
keep your knife hand dry and use your other hand to wrestle with the meat.
Cut the wing off the breast; you can take some of the breast meat with it if you like a bigger portion from that piece. Grab the drumstick and slice through the skin of the chicken to reveal the joint where the thigh joins the carcass. Run the tip of your knife through that joint (pull the leg backwards to open up the joint so you can see what you're aiming for) and pull off the leg.
Place the drumstick on the cutting board skin side down and search with your finger to find the cartilage where the thigh and drumstick meet. Cut through that joint to separate the drumstick and thigh, then pull the skin of both of those pieces and set aside (skin should go into your stockpot; it has a lot of collagen, which makes your stock richer and gives it extra body).
Run the tip of your knife next to the keel bone to separate the breast from the carcass. Pull on the meat with your other hand as you cut with the knife, keeping the blade aimed at the bones, not the meat. Once the breast is removed, you can turn it over and take off the tender and take out the big tendon that runs from the head of the tender back into the meat.
Repeat everything you just did on the other side of the bird. Put all the chicken pieces into the brine, cover, and refrigerate for at least 4 hours or as long as overnight.
Use the bones for stock: Break the carcass into 2 to 3 inch chunks (time to channel your inner cave person here). Put the all of the bones, with the neck, heart, and skin into a stock pot and cover with cold water to the depth of 1 inch. Put over medium-low heat and bring to a simmer. Skim any scum and fat that comes to the top. Once the stock stops kicking up impurities (about 45 minutes) reduce the heat to a slow bubble and simmer for another 90 minutes. Add your stockpot vegetable stash from the freezer (see good things to know below) and a bay leaf and simmer for 30 to 45 minutes more. Strain the stock through a fine mesh strainer and cool immediately before transferring to storage containers. Label and freeze whatever you won't use in the next 3 days.

I know, I can't believe I'm not cooking on gas either, but this is what came with the house. Above the stove is one of my favorite finds from Chicago's old Maxwell St. Flea market: a 2-burner griddle that I scored for $10. It's embossed with "hecho en Mexico" on one edge and "sultana" on the other.
Set up to cook: Gather a roasting or 9" x 13" pan and an oven-safe rack, a pair of tongs, a cast iron skillet that's at least 3" deep (mine is called a chicken fryer) or a heavy-bottomed Dutch oven. Preheat the oven to 350°F. A good instant-read thermometer is also very helpful. My favorite is a Thermapen, although Taylor has some good ones that are easier on the budget.

Pour 1 1/2" of oil (I prefer peanut for it's high smoking point, but blended soy and canola is fine, and less expensive) into the pan, and turn the heat to medium. As it's heating, set up your flour dredge.

This will become your chicken's coating; and also part of the country gravy later on.
For the flour dredge: Put the flour, salt, pepper, and paprika in a bowl and whisk everything together.

Pick up the soaking chicken pieces with tongs, let them drain, and put them in the flour mixture. Toss them around to coat on all sides.
Dredge and fry the chicken: Put the 2 or 3 of drained chicken pieces into the flour mixture and coat them all over — don't overload the bowl, or everything will stick together in a big mess. I start with the dark meat pieces, which take longer to cook.
Leave enough space between the pieces for the oil to surround them.
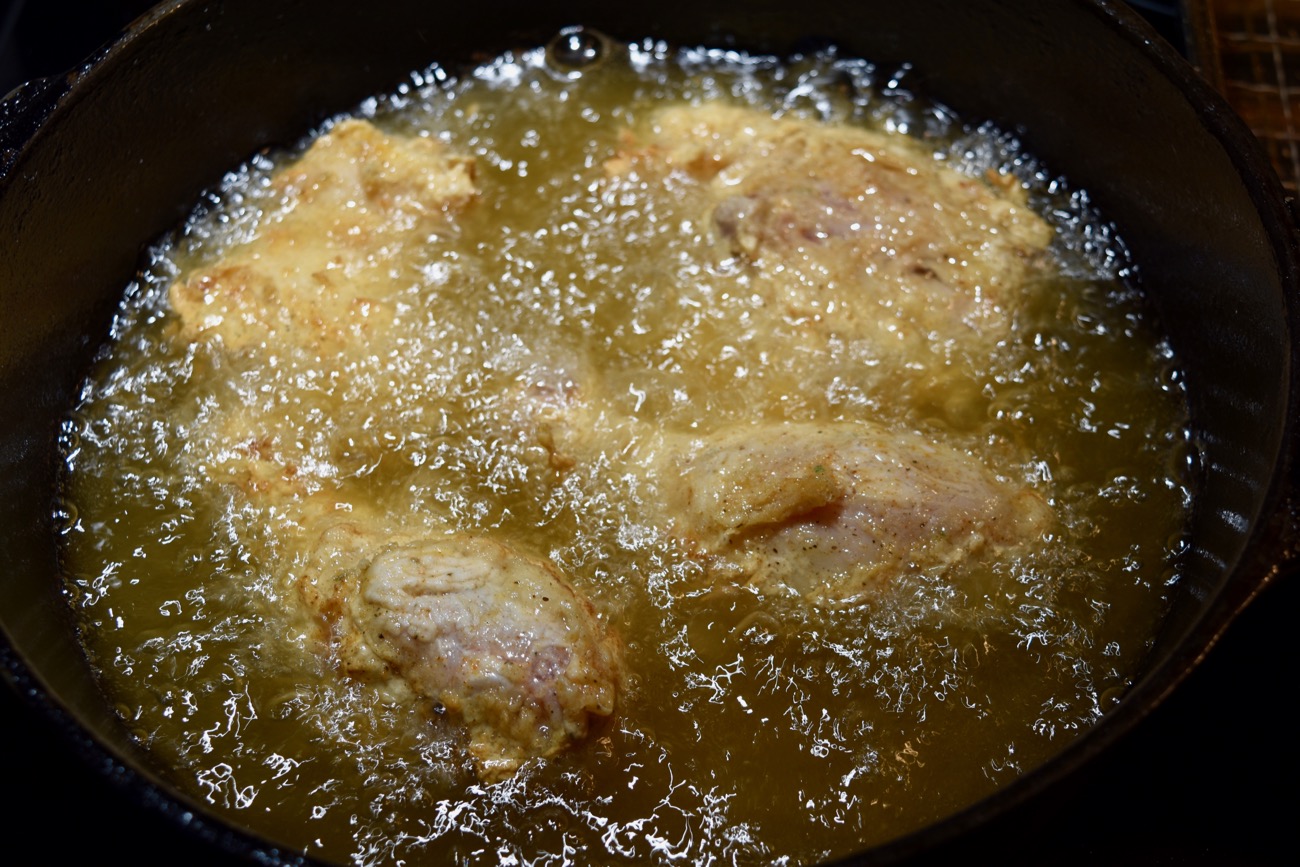
When the oil has reached 350°F, carefully place the chicken pieces into the pan; don't drop them in or oil will splash. Place one end of the piece in the pan and lower the other end before letting go; use the tongs if you're nervous about it. The oil should look like this; bubbling steadily, but not exploding.
Greasy chicken is a result of frying in oil that's not up to the proper temperature, when the coating absorbs the oil instead of being cooked by it. When done correctly, frying is a dry heat method, and very little oil is absorbed.
Cook for about 5 minutes, until you see some golden brown color on the coating when you look at the bottom of the chicken pieces (here again, your tongs are indispensable).

Place the browned pieces on the rack in the pan, then pop the pan in the oven.
Turn the chicken pieces and fry for another 3 to 4 minutes on the second side, until nicely browned. Remove the chicken from the oil and put on the rack in the pan you've set up. Put in the oven to finish cooking through while you fry the rest of the bird. After all the pieces are fried and tucked safely into the oven, make the gravy.

Pour the frying oil into a heatproof container, leaving a few tablespoons behind with the solids from the chicken coating.
Make the gravy: Drain the oil into a heatproof bowl and set aside; leave 1 to 2 tablespoons in the skillet, with the solids from frying the chicken. Note: if the solids are scorched or burned, take them out of the skillet altogether and put some of the oil and a tablespoon of butter into the pan. Add the the flour dredge, a tablespoon at a time, and mix into the fat until you have a mixture that looks like wet sand. If it's shiny or greasy-looking, add more of the flour mixture.

Remember the stock you made with the bones? Time to put it to work.
Add the stock, a little at a time, with the pan over medium heat. Stir until the gravy is smooth and begins to thicken.

You can make this gravy with all milk, but I like the flavor from the stock (plus it was free from cutting up the chicken).
Add the half-and-half or milk, again stirring until the sauce is smooth. Let it simmer for 10 minutes, adding more milk or stock as necessary to get the consistency you want.

My dry brine mix is like a utility infielder: steps in to up your flavor game whenever you need it.
Taste the gravy and adjust the seasoning if you need to; mine wanted some all-around chickeny seasoning, so I added some of my dry brine mix.

Everything in all its glory, ready for supper. From one bird I got 2 wings, 2 drumsticks, 2 thighs, and 4 breast pieces; the bird was around 3 1/2 pounds to start with.
By the time the gravy is made, the chicken is cooked through from its time in the oven, and it's ready to serve. Sauté up some greens and make some mashed spuds, or in my case, a true, self-rising flour made biscuit, and prepare for a sumptuous experience.

Good to know
Frying oil: Back in the day, solid shortening was the fat of choice for frying. Shortening was made by taking liquid vegetable oil and hydrogenating it (forcing extra hydrogen molecules into it, which made it solid at room temperature and created a very shelf-stable product). The process also took an unsaturated fat (the oil) and turned it into a saturated one, while creating trans fats that your body doesn't know how to digest. It wasn't uncommon for people to use strained, used shortening 3 or 4 times before discarding it. (First for something like doughnuts, then for chicken before pitching it).
For that reason, I choose to go with a liquid vegetable oil. The odds of it being used a second time before it goes rancid are pretty slim around my house, so I don't save it after frying. If you know you're going to be frying something, try to remember to hang on to a rinsed waxed milk carton and its top; it's the ideal vessel for pouring used oil into before putting it in the trash. DO NOT pour it down the sink unless you enjoy big plumbing bills.
The bird is the word: I bought the whole chicken I used for 77 cents a pound, WAY less than individual pieces cost. I always have a use for chicken stock and it comes free with the bird in this case. If the idea of the butchering work is too much for you, by all means buy a cut-up chicken in the meat case and a can of stock. It takes me 10 minute to butcher a chicken, but then again I've had a lot of practice.
The stock freezer stash: Whenever I cut up an onion, leeks, celery, or parsnips, I take the root ends or leaves that I normally trim off, wash them, and stash them in a bag in the freezer (no onion skins, please). Same for thyme and parsley stems. They collect over time, and usually when I have some bones to simmer I don't have to bother cutting up mirepoix; I just empty out the collected frozen veggie bits into the pot.
No thermometer? If you don't have one handy, cut a couple 1" cubes of bread. When you see the slow, hypnotic movement of the oil moving in the pan, toss one of the cubes in. If it floats, sizzles, and becomes golden brown within a minutes' time, the oil is ready to go. If it lays around like a tired goldfish, your oil isn't hot enough. If it turns dark brown in 10 seconds, the oil is too hot.
Caring for cast iron: If the pan is well seasoned, it will need very little besides a scrub and a rinse; I use a little bit of soap but make sure to rinse very well, and most critically, immediately dry the pan, either in the oven, or on top of the stove. Any water drops left in the pan will create rust and hurt the seasoning. Old pans get pitted from allowing them to rust.
Try not to scrape or gouge the pans; I use either a bristle brush or this chain mail to scour out any stubborn bits of food. The chain mail cleans easily in the dishwasher.
Don't use cast iron for acidic foods, like tomato sauce braises, or making piccata in the pan after searing chicken or fish. The acid will hurt the seasoning and the sauce is likely to take on a metallic taste.


